Migrate VMware to Proxmox
found many documentations about "easy" migration but this one is the most simple and I would say fastest way.
Prerequisites: a network share accessible via SMB/NFS from server and your workstation e.g. Hetzner Storage box, NAS, Unraid/Truenas
Lets start with preparing the VMs in ESXi before we export the disks
Windows:
simply download the VirtIO Drivers .iso from fedoraproject.org to your workstation. This can be uploaded and attached to the migrated VM later on in Proxmox. Just shutdown the VM for exporting the image.
Linux (Ubuntu):
ssh into your machine and prepare for migration
- perform full update
sudo apt update && sudo apt upgrade
- cleanup apt
sudo apt autoremove- install quemu guest and net-tools (will help you identify new ip after migration)
apt-get install qemu-guest-agent net-tools
- rename your interface from ens160 to ens18
nano /etc/netplan/00-installer-config.yaml
- should be
This is the network config written by 'subiquity'
network:
ethernets:
ens18:
dhcp4: true
version: 2
- optional: if you have a graphical interface running on your ubuntu e.g. gdm3 disable it to start your VM in console for troubleshooting
systemctl set-default multi-user.target
- shutdown the VM
shutdown -h now
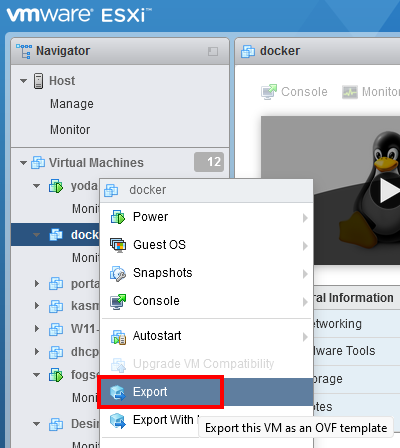
Export your disks from ESXi webconsole
- simply rightclick the machine in virtual machine overview and choose export
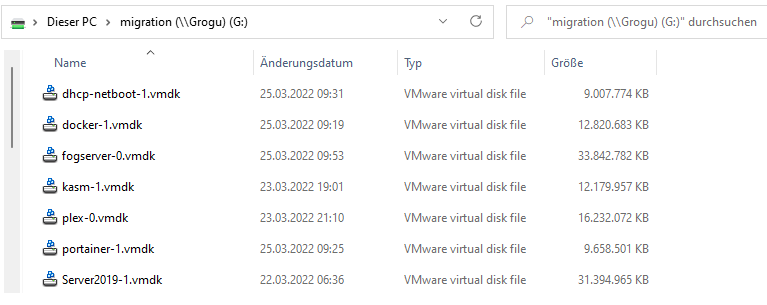
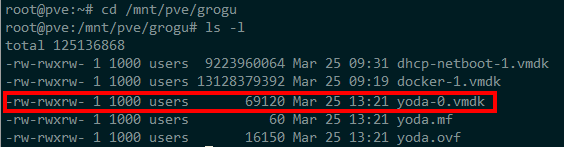
- save files directly to your shared drive when attached to your workstation or temporary to your workstation. You can also move the files later. This image will have only the really consumed space of the disk instead of whole disksize from your .vmdk in ESXi storage as you can see here on my shared drive
- once all disks are exported head over to your Proxmox host to prepare your VMs. If you do not have a second machine and want to reinstall your hypervisor machine to Proxmox make sure you have noted all your VMs configurations including hostname, MAC, IP, vCPUs, RAM, HDD and special setups like PCIe paththrough or attached USBs e.g.
yoda 00:0c:29:96:4d:92 192.168.78.74 12vCPUs RAM:20GB HDD: 10GB +USB:unraid +SATA:8PORT
Prepare your VMs on Proxmox
- optional Proxmox Dark mode: https://github.com/Weilbyte/PVEDiscordDark
- simply create VM in Proxmox with same configuration like on ESXi

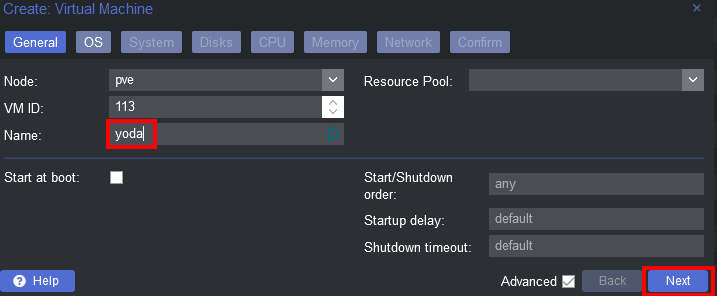
- choose Linux or the corresponding system (Windows,Solaris)
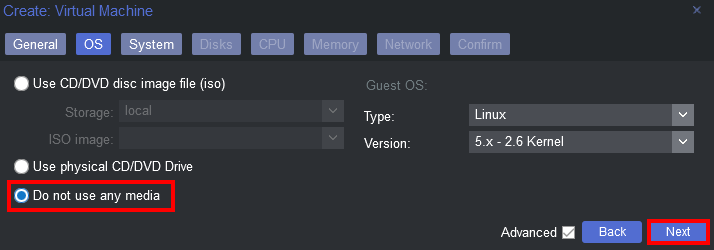
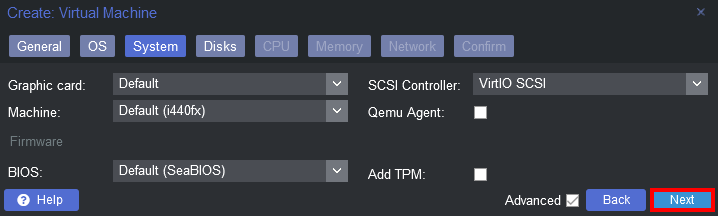
- you can leave system as default for the chosen operating system (for newer Windows like 11 you need to enable TPM and as there is a bug on Windows Server 2019 with German language you would also need to change machine type to 5.1)
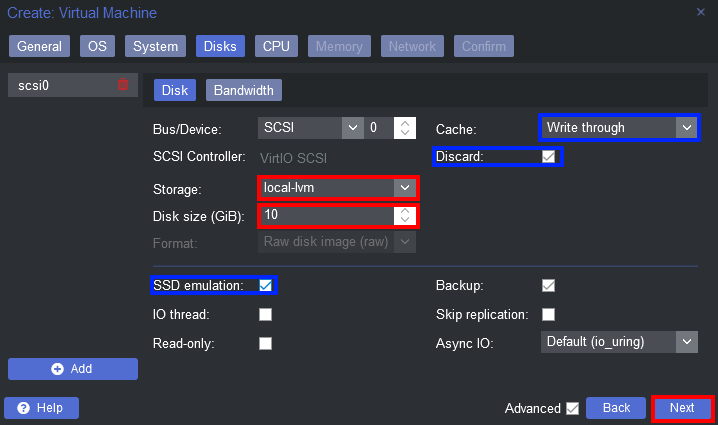
- set disk size to full configured size you previously had on ESXi and choose the storage your disks are stored. If your storeage is on an SSD or NVMe you can optionaly set the blue marked values otherwise leave standard settings
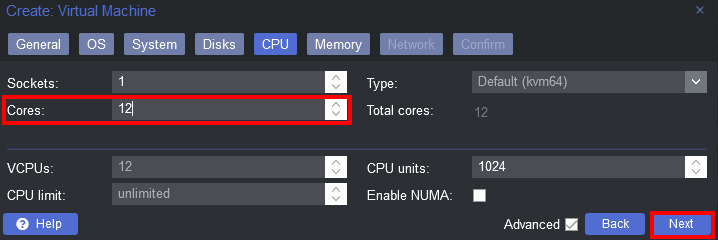
- set vCPU to the desired value. There are more settings on this page which we can safely ignore unless we do not migrate from a specific CPU type that needs extra flags enabled or disabled. The default kvm64 is a Pentium 4 look a like CPU type, which has a reduced CPU flags set, but is guaranteed to work everywhere.
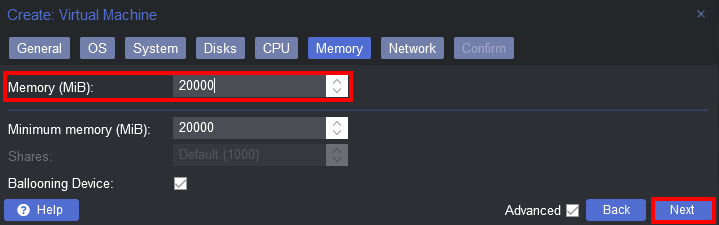
- as this machine is my primary unraid server it has quite a lot of memory (20GB) but a small disk as those are attached by a PCIe controller. You can leave balooning enabled as advised by Proxmox documentation
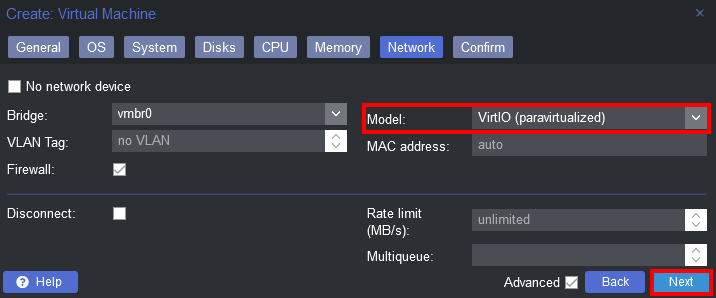
- you can leave the default VirtIO network device as this has the highest performance and is capable of >1GBit and only swith to Intel E1000 if you have compatibility issues
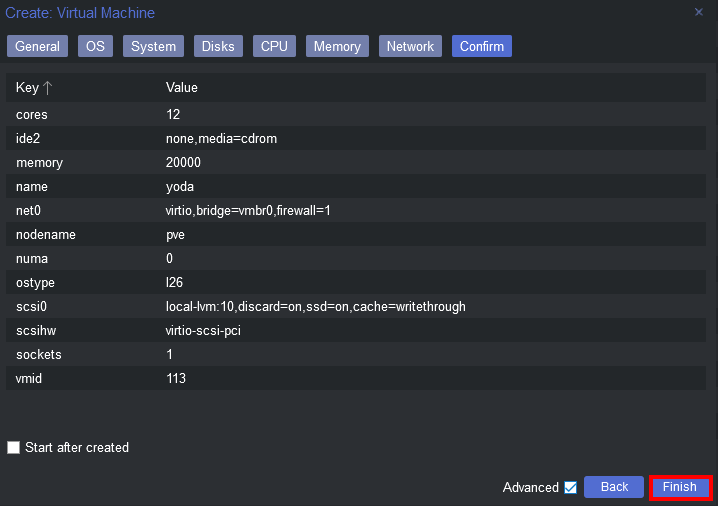
- confirm and finish without starting VM to get it created on Proxmox
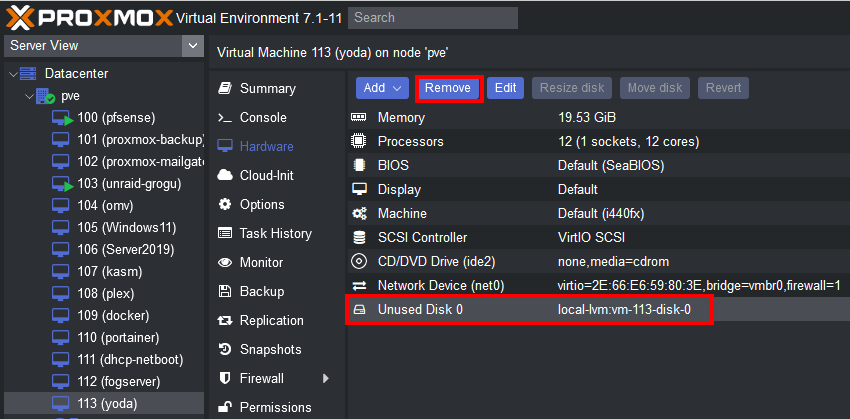
- navigate to your VMs hardware in Proxmox and detach the harddrive created
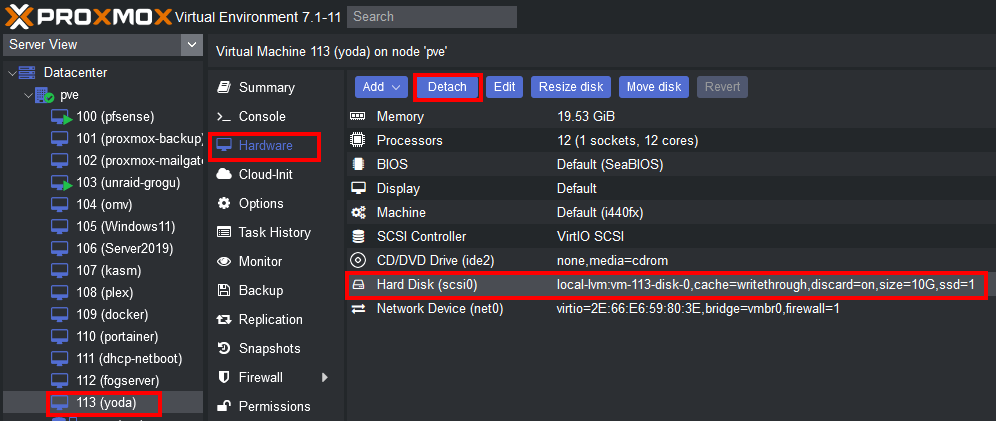
- and remove it
Mount network share on Proxmox
- navigate to datacenter storage to attach the network share with your exported ESXi disks
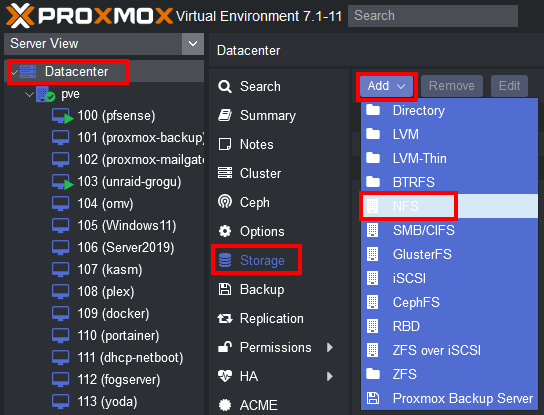
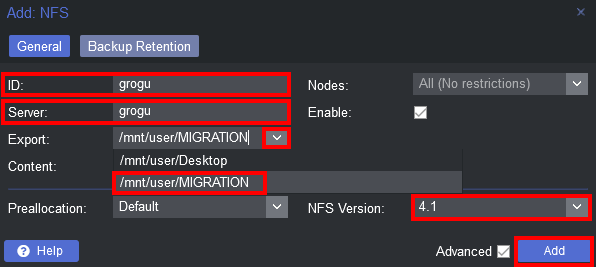
- I am using NFS from my secondary unraid server but SMB/CIFS should also do the job depending on which system you stored your exported disks. ID will be the path on Proxmox, Server is your NAS hostname (or IP), Export will give you the available shares on server and NFS Version can either be default or the version you use. If everything is okay the greyed out Add will be available
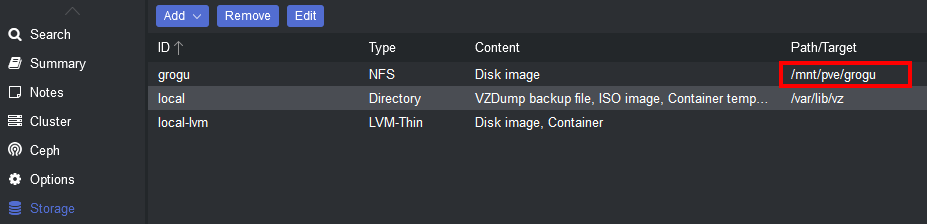
- the exported disks are now available on your Proxmox
Import ESXi exported disks to Proxmox VM
- ssh into your proxmox and switch to the mounted network share
cd /mnt/pve/grogu
- verify if your exported disks are accesible
ls -l
- import the disk to the Proxmox VM using the ID shown in Proxmox

qm importdisk 113 yoda-0.vmdk local-lvm -format qcow2
- the import should take a while depending on the size of the disk and the network speed between network share and your Proxmox

- As long as your real consumed disk space does not exeed the available disk space of your storage it is safe to ignore the warning. This sample is a empty disk as unraid is booted from USB lets try with a bigger one 160GB VM disk containing 13GB on a Gigabit Network card ~10min
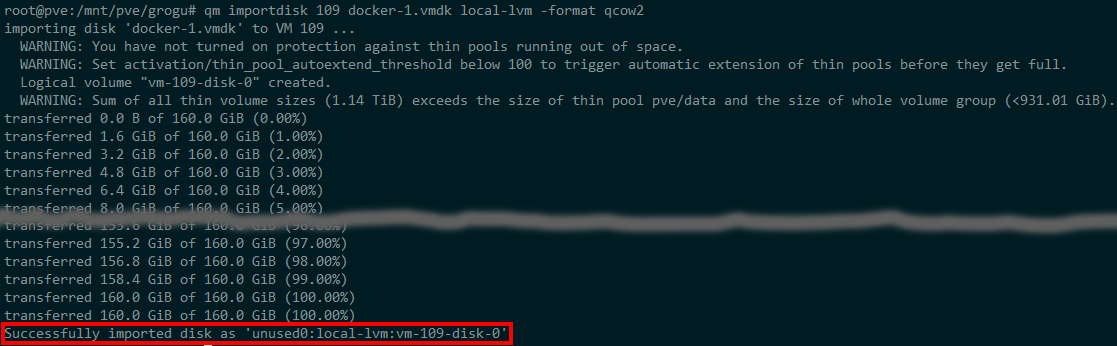
- the disk was imported in your VM as unused disk where you can edit and enable it in your Proxmox VM settings
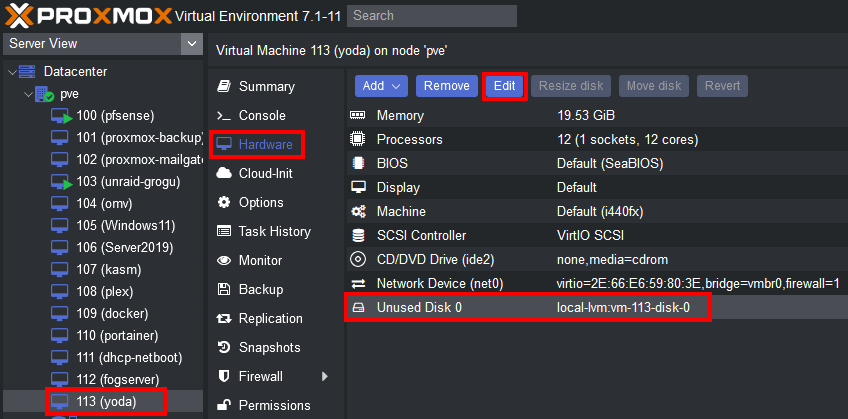
- you can leave the default to SCSI which should be compatible in most cases (or switch later on to SATA if it is not booting) and Add the device

- switch to VM options to enable bootdevice and drag the device up to be first boot device
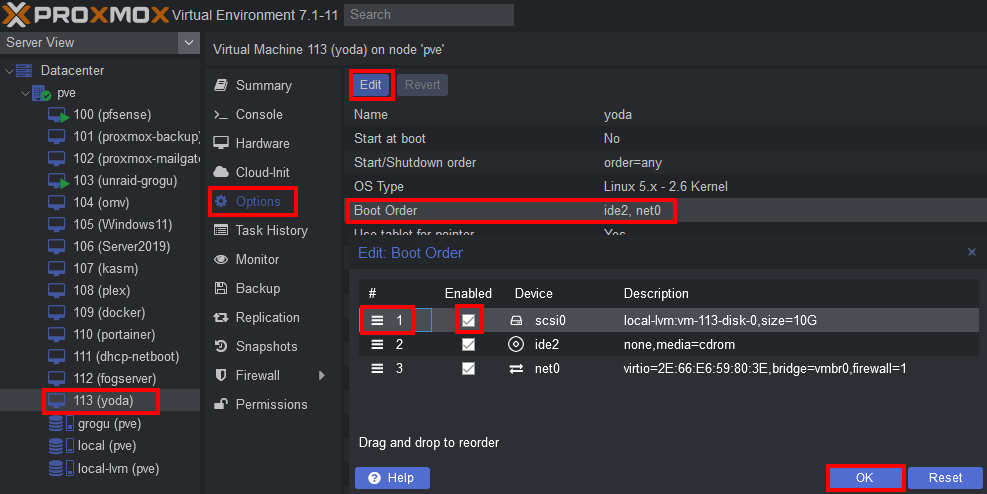
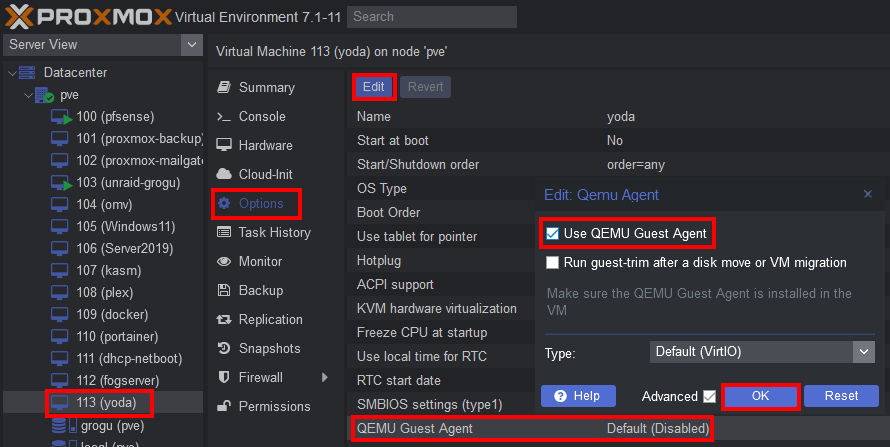
- enable QEMU Guest Agent which is the equivalent to VMware tools and will also show networking information after boot in Proxmox
- if you have pathtrought devices to be attached you may have to enable it first
- ssh into your Proxmox
nano /etc/default/grub
- edit GRUB_CMDLINE_LINUX_DEFAULT and add
- for Intel CPUs
intel_iommu=on
- for AMD CPUs
amd_iommu=on
- so in my case it would be
GRUB_CMDLINE_LINUX_DEFAULT="quiet intel_iommu=on"
- save the file and update grub
update-grub
- reboot your Proxmox
reboot
- shh into your proxmox after reboot and verify if it is working
dmesg | grep -e DMAR -e IOMMU
- should give you a line like DMAR: IOMMU enabled